Automated measurements over the lifetime of the machine
Employing measuring systems in the working area of a CNC machining centre is still an unfamiliar idea for some quality experts today. With its probes in use at the German company Scherzinger Pumpen, Blum-Novotest has demonstrated that automated measurement not only works effectively in this harsh environment and in two-shift operation, but does so reliably and accurately over many years.
“Our core competencies in manufacturing are in milling, turning and grinding, as well as in logistics and assembly. We machine metal as well as plastic and, in doing so, achieve a high level of quality and reliably tight manufacturing tolerances,” reports Mario Maier, head of process planning at Scherzinger Pumps. “BLUM touch probes and laser light barriers, which we use in many machining centres, help us to accomplish that. The probes have an astonishingly long service life.” For example, a BLUM probe that ran in two-shift operation in one of the Heller machining centres was in use from 1998 to 2021. It was only replaced because BLUM had long since discontinued the series and the Furtwangen-based company wanted to remain flexible in case of an emergency. Even the oldest of the new TC50 probes have been in continuous operation for over 18 years – with virtually no failures.
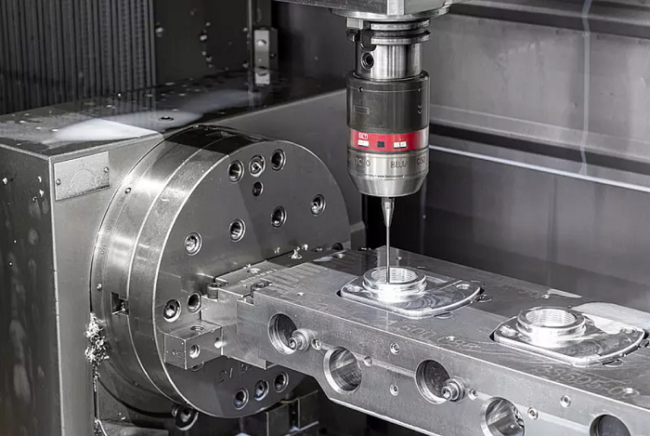
In 2003, BLUM revolutionised probe technology for machine tools with the TC50 infrared probe and its integrated, innovative measuring mechanism. At Scherzinger, the TC50 probes are primarily used to measure bores and for workpiece zero-point detection. The housings for brine pumps, for example, are machined from two sides by rotating the clamped components in the machine. The drive is located on one side, while the two gear wheels of the actual pump are located on the other side. The through-hole of the drive axis is machined from the drive side in the first setup. After one side is finished – there are five housings per setup – the housings are swivelled by 180 degrees and the pump side can be machined.
To ensure that the two machining operations are precisely aligned with each other, the position of the through-hole is measured for all five housings after swivelling using the probe, which has been mounted in the machine spindle. The measured positions are then taken into account during the second machining operation so that, for example, the threaded holes for the cover can be precisely aligned, drilled and cut. In this way, the production specialists ensure that the housing, internal components and cover later fit together exactly and the pump achieves a long service life and runs as quietly as possible.
In other areas, the probes are used to ensure and document ongoing production quality. This is especially important when it comes to parts for the automotive industry. In addition, when measurements are performed in the machine, the measuring room is relieved. Apart from random quality checks, the parts can go directly from production to assembly. Process-integrated measurement at and the Furtwangen-based company also avoids unnecessary scrap.
The BLUM probes even deliver highly precise measurement results when operating in the presence of coolant, considering that the TC50 works absolutely reliably under the most adverse conditions. Scherzinger is also impressed by the measuring cycles supplied by BLUM, which can be readily integrated into the NC programs created: All that is required is to call up the macro for the probe and enter a few parameters. Then the NC program is created automatically. The BLUM NC modules reliably execute the measuring processes at up to 3000 mm/min. Thus, integration of the measurements generates almost no programming effort.
With the help of the BLUM touch probes, Scherzinger ensures high production quality and lower scrap production by detecting problems in the machine early on. “In addition, the precision we achieve thanks to the BLUM probes allows us to manufacture housings and covers independently of each other, which of course greatly simplifies logistics. Apart from random samples, the components can be sent directly to assembly,” Mario Maier concludes. “Because we obtain measurement data directly during machining, we can immediately incorporate it as feedback into the machining process, thereby saving time and effort. Thus, BLUM touch probes play a very central role in our processes and help to ensure the high quality of our products.”


COMMENTS