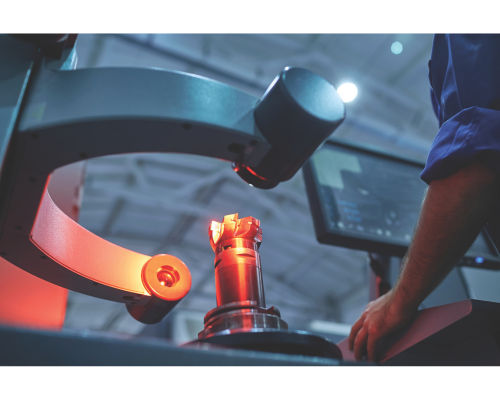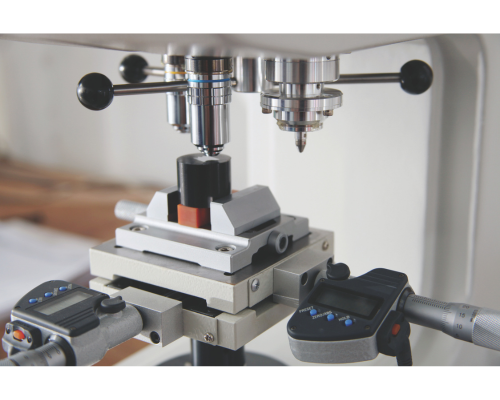
In the world of die and mould manufacturing, where accuracy is everything, digital metrology is emerging as a game-changer. By combining technologies like high-resolution scanning, real-time data analysis, and advanced simulation, manufacturers can now achieve tighter tolerances, faster turnaround, and create
better quality components while reducing waste and rework.
-Sudhanshu Nayak and Neha Basudkar Ghate
In today’s manufacturing landscape, components have become increasingly complex, development cycles shorter, and tolerance requirements tighter. Traditional “measure-at-the-end” approaches no longer suffice. Instead, manufacturers are embedding metrology throughout the production chain—enabling proactive inspection, accelerated feedback, and superior part quality. Technologies like optical scanners, laser 3D digitizers, inline measurement, virtual validation, and advanced non-destructive testing are ushering in a new age of precision and productivity in die and mould production.
Quality Everywhere: From Cast to Core
Quality is no longer just a final check—it’s an ongoing, integrated discipline. From casting techniques— including sand, die and investment casting—through machining, assembly, and validation, each stage benefits from metrology tools that provide actionable data and continuous verification.
Manoj Sundaram, Head — Business Development, Carl Zeiss India (Bangalore) Private Limited, highlights: “Within the die and mould industry, speaking about modern measuring systems related to manufacturing castings, including moulding, machining, and assembly processes, quality is an essential step. Regardless of the casting technique employed—sand casting, die casting, or investment casting— quality remains a top priority across all methods. Advanced measuring technologies not only enhance these processes but also support the entire production chain, ensuring precision and excellence throughout.”
Modern digital inspection ensures that quality is not reactive but predictive. In casting, for example, 3D scanning of cores and moulds before pouring can identify mismatches or deviations. In machining, CMMs
verify tight tolerances between each operation, while digital gauges and inline probes monitor tool wear.
Assembly stages use alignment verification tools to confirm fitment and function. This end-to-end
quality assurance loop reduces rework, shortens ramp-up timelines, and ensures consistency from raw
material to final output.
Optical Metrology: Full‑Field Insight & Virtual Assemblies
Optical Metrology enhances quality by using structured light, laser triangulation, or time-of-flight scanning to provide full-surface, non-contact measurements. By capturing millions of data points per
scan, these systems offer first-article inspection to ensure mould geometry aligns with design intent, virtual assembly analysis to overlay digitised mould halves or cores, and statistical monitoring to identify dimensional drift or process instability.
“For medium-sized moulds, optical measurement techniques enable full‑field inspection and digitalisation of the shape and dimensions of castings. This facilitates thorough evaluations during first-article inspections and series production. The measuring data of moulds and cores enable a virtual assembly analysis of mould halves and cores. This serves for the inspection of parting surfaces regarding offset, fitting and form fit of mould halves and core clearance,” explains Sundaram.
The technology goes further. High-resolution scans (≥1M points/sec) can detect warpage, draft
inconsistencies, and parting flap deformations. GD&T overlays on CAD files show exact variations
in tolerance zones. Heat maps, colour comparisons, and deviation statistics drive intelligent corrections
before physical assemblies are attempted. This not only minimises assembly errors but also enables
predictive maintenance by spotting wear patterns over time. Without touch probes or manual fixtures,
users achieve speed, accuracy, and reproducibility.

3D Scanning For Large Die Components
Large-scale dies—ranging from 1 to 4 m² or more—introduce unique metrology challenges due to their size, complex surface contours, and need for tight tolerances. Traditional CMMs often struggle with accessibility and speed, especially when dealing with deep pockets, undercuts, and internal ribs. Modern 3D scanning solutions, however, have evolved to meet these demands with unmatched flexibility
and precision. Here’s how modern 3D scanning technologies are rising to the challenge:
– High-Density Full-Field Capture:
Structured-light and laser triangulation systems now capture millions of data points per second,
producing a dense point cloud that covers the entire die surface. This allows for a complete digital twin
of the die, making it possible to evaluate features like curvature, draft angles, and wear patterns.
– Scalability and Range:
Tripodbased scanners are ideal for scanning large, open surfaces, while robotic arms and handheld
systems can access tight, recessed features. These setups offer high repeatability and consistent
accuracy—typically within ±0.1 mm—regardless of part complexity.
– Hybrid Scanning Strategies:
To optimise both speed and detail, manufacturers often use a combination of terrestrial laser scanning for overall coverage and handheld scanning for fine details. This dual-method approach ensures that both geometric form and functional features are precisely captured.
– Portable CMM Alternatives:
Arm-based optical CMMs bring metrology-grade inspection to the shop floor. They allow technicians
to perform real-time checks and in-situ verification of key features— especially useful during mould
adjustments, insert fittings, or repair work without removing the die from the press.
– Computational Post-Processing:
Once scanning is complete, powerful CPUs and high-RAM systems (often >64 GB) handle mesh fusion, data filtering, and CAD alignment. Post-processing generates comprehensive reports including colour maps, GD&T checks, and variation analysis—all ready within hours.
Mr. Sundaram elaborates: “For large-scale die components, 3D scanning technologies are efficient given the combination of a suitable sensor and software. As an example, an advanced 3D scanner developed with an ultra-bright laser light source and a measuring area of up to 4 square metres can capture up to 2×12 million coordinate points in a single scan, thereby accelerating the measurement process. The data is processed using inspection software that automatically detects quality issues and categorises them,
revealing even the smallest defects quickly and efficiently. This system is particularly suited for 3D scans
of large-volume parts, providing full-field data with highly detailed resolution in minimal time.”
These capabilities enable a seamless workflow—from scan acquisition to inspection reporting—
while significantly reducing the time and labour involved. Real-time comparison against CAD models
ensures dimensional conformity, highlights deviations, and supports early intervention before costly
mould trials. As a result, die makers can reduce rework, improve first time fit, and shorten the overall
development cycle.
Real-Time Feedback: Embedded Decision-Making
No longer confined to post-process inspection, measurement is now integrated directly into production.
Inline probes, machine-integrated vision systems, and scheduled scanning checkpoints collect realtime
dimensional data.
Uday Dixit, General Manager, PolyWorks India, points out: “In die and mould manufacturing,
real‑time data feedback plays a crucial role in improving the quality assurance process by enabling
continuous monitoring, immediate corrective actions, and enhanced decision‑making. Traditionally,
manufacturers relied on periodic inspections and post‑production evaluations, which often led to
delays in identifying defects and inefficiencies. However, with real‑time data feedback, quality
assurance becomes a dynamic and proactive process.”
Dixit adds: “Real‑time measurement data allows manufacturers to detect deviations from design specifications as soon as they occur. Also, the real‑time feedback ensures that dies meet exact specifications before full‑scale production begins. This enables quick adjustments to machining
parameters, reducing the likelihood of defective parts and minimising material waste. Continuous data
collection from 3D measurement systems ensures that every stage of die and mould production adheres
to predefined tolerances. Along with it, continuous monitoring helps maintain dimensional accuracy
and surface quality. Manufacturers can optimise tool paths, adjust machining conditions, and refine
mould designs based on live feedback, leading to higher precision and consistency.”
“Real‑time data sharing across departments—such as design, production, and quality control— ensures that all stakeholders have access to the latest measurement insights. Integration with digital platforms enables automated inspections and reporting, reducing manual intervention. This improves communication, reduces errors caused by outdated information, and accelerates decision‑making.
By identifying quality issues early in the process, manufacturers can significantly reduce the need for
costly rework and scrap,” Dixit notifies.
When integrated into PLM/MES/CNC ecosystems, these measurement systems create a live loop where deviations automatically trigger alerts, stop production, or adapt tool paths. The results? Less scrap, greater agility, and faster firstpass success.
Digital Twins & Connectivity Redefining Tryouts
Simulation and actual measurement are converging in digital twins— virtual counterparts of physical
moulds and dies. These twins evolve as real-time measurement data updates geometry, alignment,
thermal behaviour, and even wear over time. When paired with advanced simulation, this enables
full virtual tryouts, including flow simulations, shrinkage analysis, and core behaviour prediction.
Dixit explains: “Advanced simulation software solutions for die tryouts are revolutionising the
manufacturing landscape, enabling customers to eliminate the need for traditional checking fixtures.
These digital tools can conduct highly precise virtual evaluations, significantly reducing time, costs, and
material waste.”
“Among the most impactful innovations in digital inspection technology are Digital Twin and
Digital Connectivity—two essential pillars that drive efficiency and accuracy in tooling rework processes.
The Digital Twin concept provides a virtual replica of physical assets, allowing manufacturers to simulate
performance, identify potential issues, and optimise designs before production begins. Meanwhile, Digital
Connectivity enhances real‑time data exchange, enabling seamless collaboration between teams and
integrating insights across various stages of manufacturing. These advanced digital solutions not only
streamline tool rework processes but also improve operational efficiency multiple fold, ensuring higher
precision, reduced downtime, and increased overall productivity for manufacturers,” adds Dixit.
Toolmakers use this feedback to preemptively adjust cooling channels, tweak draft angles, or reinforce
high-stress areas—all before a single physical trial is performed. Seamless connectivity between simulation software, scanners, and CNCs ensures changes are made efficiently, while digital twins document every iteration—building a complete traceability and optimisation record.
Non‑Destructive Testing: X‑Ray Insight
Even the most dimensionally accurate mould or die can fail if it harbours internal flaws. Nondestructive
testing (NDT) using X-ray and CT technology provides internal visibility, ensuring true volumetric
integrity. The following NDT solutions offer critical insight into internal structures:
-2D Radiography: Ideal for rapid screening, these systems can inspect high volumes inline. Flatpanel
detectors and adjustable beam energy allow high-contrast imaging across varied materials and
part sizes.
-Computed Tomography (CT): Full 3D reconstruction through cone- or line-beam techniques
allows detailed inspection of internal cavities, wall thickness, and inclusion mapping.
-AI-driven Defect Detection: Machine learning models, particularly CNN-based systems trained on defect libraries, can automate the classification and flagging of anomalies—enabling real-time sorting and response.
-Standards & Safety: ISO and IAEA standards govern safety and quality benchmarks. Proper shielding,
interlocks, and digital archiving ensure compliance and traceability.
-Line Integration: Robotic part handling and MES-linked tracking allow X-ray systems to operate
inline, ensuring 100% of critical parts are inspected without production slowdowns.
By combining volumetric CT with optical scanning, manufacturers build a dual-certification profile—external geometry and internal integrity— before dispatch or assembly, especially critical in high-load
applications like injection moulds or press dies.
Sundaram says: “The early assessment of parts produced by the mould is crucial in today’s short
development cycles. To meet a quick development cycle reducing the number of iterations in reaching
to final mould quality is important. To identify critical defects well in advance in the metal injection
process and to eliminate the causes, a range of X-ray solutions are available that specialise in fast and reliable defect inspection close to the production line.”
“Depending on the production process, certain casting defects are unacceptable due to safety and industry standards in export goods where the quality norms are even higher. Technology solutions
for X-ray inspection with Artificial Intelligence support ensures fast and accurate defect detection at the
speed of manufacturing. 2D systems can be modified to suit customers’ component shape, throughput and critical ROI are programmed to make the process quicker and efficient,” adds Sundaram.
Conclusion: Advancing Towards A Precision-Driven Future
Digital metrology is no longer optional—it’s foundational. Optical scanning, laser digitisation, real-time
feedback, virtual twins, and advanced X‑ray NDT create a continuous measurement feedback loop
spanning the entire tooling lifecycle. This paradigm enhances part accuracy, reduces scrap, accelerates
delivery, and enforces compliance with stringent quality standards.
The future lies in tighter integration between scanners, simulation engines, and production systems. As data becomes action, tooling sophistication becomes institutionalised—and metrology becomes the central nervous system of manufacturing. We leave our readers with this: precision isn’t delivered—it’s engineered—through data, connectivity, and intelligent measurement.
Images used for representation only.
Courtesy Envato Elements.
This article was published in TAGMA Times


COMMENTS