Automated production for high-end bike components
Bikes, especially mountain bikes, have always offered a lot of space for innovation. And this is in no small part thanks to enthusiastic cyclists in small specialised companies who know how to impress with their innovations. Vecnum develops and manufactures components for mountain and gravel bikes in Isny, Germany. Probes and tool setting probes from Blum-Novotest play an important role in the production processes of the company based in the Allgäu region, ensuring high accuracy, process reliability and automated machining.
High manufacturing quality is not just an end in itself for Vecnum, producer of innovative components for mountain and gravel bikes: For instance, play in the joints of the suspension stem would have a strong negative impact on the riding experience. At the same time, high forces act on the joints if the rider pulls on the handlebars while pedalling. “The seat posts also generate strong diagonal forces when the rider sits on them. These are a product of the high dynamics created through pedalling and the ground,” adds company founder Marcell Maier. “However, even the slightest amount of play is unwanted here. We handle this with selected materials and the precise manufacturing process. The upper telescopic tube with the connection for the saddle is extruded in one piece from high-strength aluminium.”

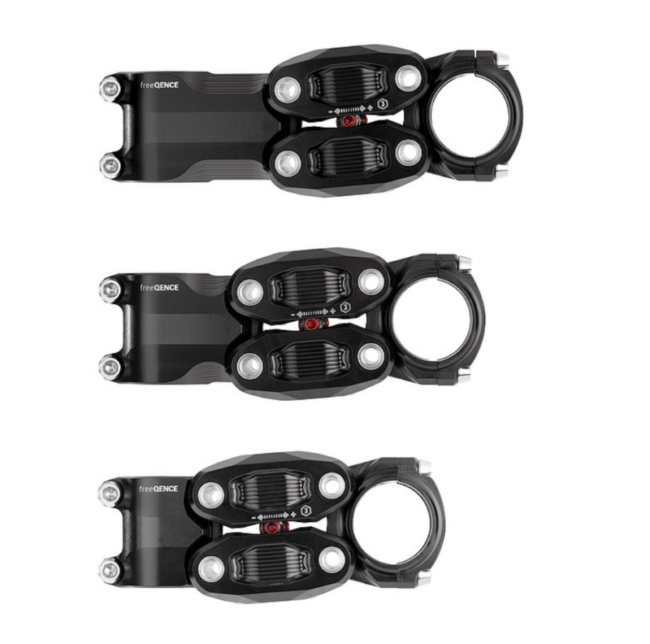
Although the Vecnum product parts are relatively small, the machining performance is considerable: The aluminium components of the freeQENCE-stem are made from blanks with an initial weight of two kilograms, with 300 grams left at the end. The freeQENCE-components are currently milled from solid. As quantities increase, the Allgäu-based company will surely switch to forging blanks, which already have a rough shape and require less machining. Machining takes place in a cover to an accuracy of one hundredth of a millimetre, meaning in Isny they have to stay within half a hundredth per machining side. However, the inaccuracy is in the range of a hundredth due to the warming of the machine during machining alone. This means that the specialists at Vecnum have to constantly measure and compensate.
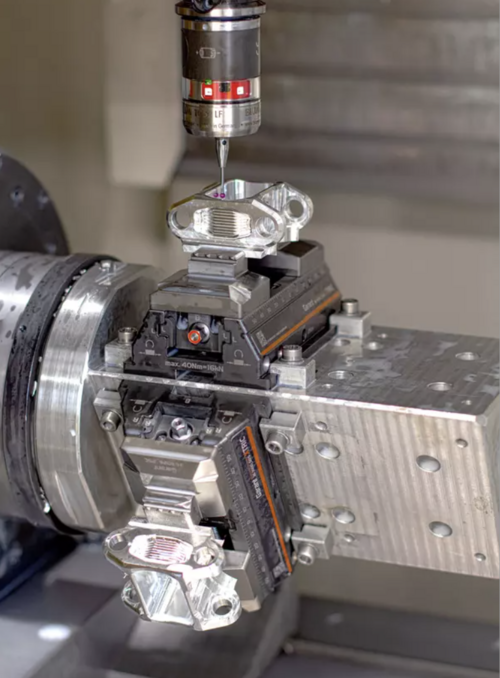
The two FANUC Robodrill machines used in production are each equipped with a type TC52 LF touch probe and a Z-Nano tool probe from BLUM. “LF stands for “low force.” The probe operates with only 0.65 N measuring force when probing in X/Y instead of 2.3 N. The reduced measuring force is an advantage, especially when it comes to styli with very small ruby balls or delicate workpieces,” explains Erhard Strobel, sales employee at Blum-Novotest. “The multidirectional BLUM measuring mechanism guarantees high precision with a repeatability of 0.3 µm 2 σ for the TC52 LF. Like all touch probes from BLUM, the systems used by Vecnum also feature a miniature light barrier in the interior. The switching signal generation of measuring values is generated optoelectronically here, so it is wear-free.” Vecnum receives the seat posts as flow-forged blanks, with the oval inner contour and a groove already machined with a broach. The inner contour is measured with the TC52 LF probe so that the outer contour can then be created in a precise position.

For other components such as the links of the freeQENCE stem, the Allgäu company uses clamping towers where the clamping devices are installed. The clamping towers are attached to a horizontal rotary axis to allow the three machining sides of the tower to swivel upwards for machining. The clamping towers are exchanged to switch between the first and second clamping. To rule out user error, the BLUM probe scans the clamping tower, identifying which clamping is on the machine.
The Z-Nano probes are used to measure the workpiece lengths and, for instance, to compensate for the change in length due to machine warming. If sensitive tools such as a 0.8 millimetre drill bit are used, a breakage detection is also done after machining. This is very quick and reliable, as the measuring mechanism of the tool setting probe operates with very low measuring forces due to the linear working principle and lateral forces acting on the tool are ruled out. “Tool setting of cutter heads with the Z-Nano probe creates a real “aha” moment,”
explains developer and NC specialist Matthias Wimmer. “We measure all the cutting edges and it turns out – no matter how precise the tool is on paper – specific cutting edges are often longer than others, meaning the dimensions of the machined surface are different than expected. Measurement is a very important factor here in the process for high-precision production.”
This is all the more true because Vecnum does not have a temperature-controlled workshop and does not work all around the clock. The external temperatures and the machine warming caused by the high machining volume changes the machine geometry. In order to ensure the necessary tolerances on the components, Vecnum also uses measurement technology despite temperature compensation. This is why the machine is recalibrated before each machining process. This must be done very quickly – and there is no substitute for measurement in the process. Especially when the measuring points can be approached at a feed rate of two metres per minute – which is the case with BLUM probes. The Allgäu company recently received an update from BLUM for the measuring cycle on the Z-Nano. The new cycle saves a few seconds per measurement by executing the pre-positioning process, meaning the first approach of the tool setter, in rapid traverse. This saves a lot of time when, for instance, the tools are changed during set-up for a new machining process and all 21 tools in the turret head are measured once.
Today, bicycles are objects of prestige, which is why the appearance plays an important role. That means the surface quality is very important. “This does not necessarily mean it has to be completely smooth; often a certain “milled look” is the goal. For this to look good, the process has to work and the human factor has to be ruled out to achieve consistently positive results,” emphasises Marcell Maier. “You often hear that probes are superfluous on small machining centres – I think that’s completely untrue. In order to be able produce the highest quality on a consistent basis, measurement in the process is essential.”
Thanks to his professional experience, Marcell Maier has a great deal of knowledge and experience in the field of machine tools. He is also still active in this industry with his engineering firm. He practically grew up with probes and has gotten to know the products of different manufacturers: “I really like BLUM probes. The measuring accuracy in particular is very high. That’s why we are very happy with Blum-Novotest as a partner, from the products to the consultation.” Marcell Maier also appreciates the technical principle of BLUM probes: “For instance, I am quite impressed by the shark360 measuring mechanism with its integrated face gear – it is simply a well-designed technical solution that impresses me as an engineer. The measurements are also very quick and the entire measuring system is absolutely reliable – this is just perfect for our requirements.”


COMMENTS